This easy tie-dye shirt came to the rescue when my oldest informed me two weeks ago that he needed a 70’s costume for his class May Day dances. I was in a panic.
 Easy Tie-Dye Shirt
Can I say how thankful I am for products that make my life easier. I live in a small town and I was trying to figure out just how I was going to come up with a 70’s costume in the short amount of time I had before my son’s program. My friend Carolina from 30 Minute Crafts mentioned that she had a Tulip One-Step Tie Dye Kit I could have and she pretty much saved the day.
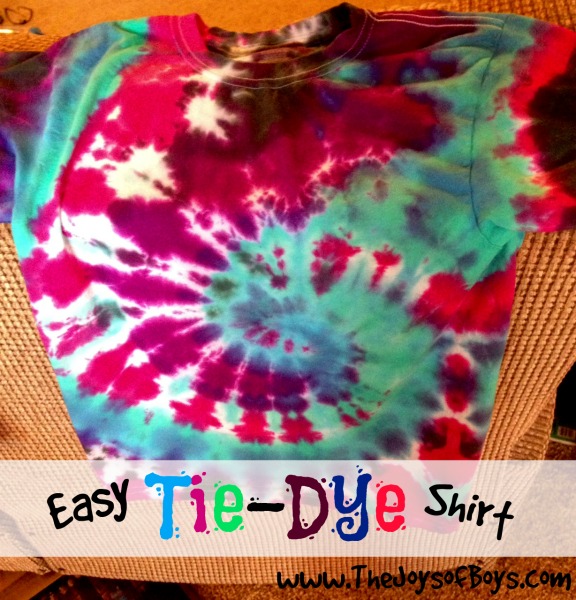
The thing that I loved most about this kit is that the colors turned out really dark. I remember making tie-dye shirts for girls camp and they didn’t turn out nearly this good.
Easy Tie-Dye Shirt
Supplies needed:
- Tulip One-Step Tie Dye Kit
- White T-shirt(s)
The great thing about the kit is it has several ideas and examples of different types of shirts you can make. We chose to make a traditional swirl tie-dye shirt.
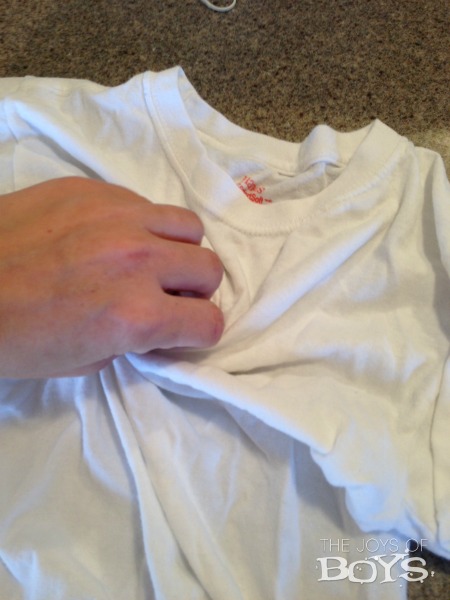 Step 1: Pinch the shirt where you want the swirl to be and start twisting it up until you have it all in a ball. Secure the shirt with the included rubber bands. You can add as many rubber bands as you want to hold it in place and to give you a guide for where you will add your color. I did one shirt with 3 rubber bands and 1 with 5. I preferred the look of the one with five because it gave better color variations.
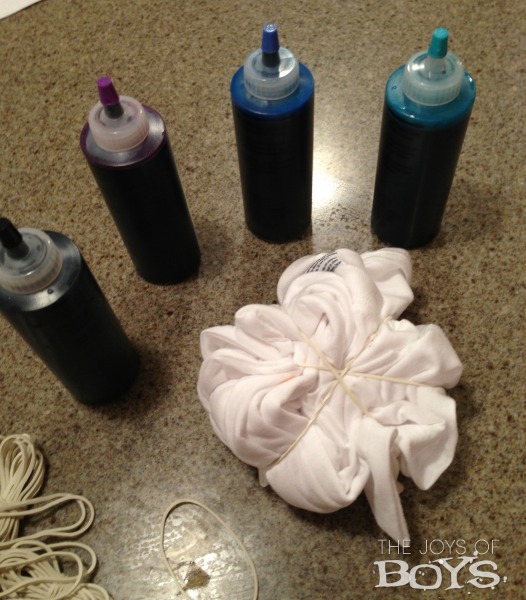 Step 2: Put on the included plastic gloves and cover your work space with newspaper, foil or something that will keep it safe! Don’t forget this step. 😉
Step 3: Add water to the included bottles of dye and dissolve the power dye.
Step 4: This is the fun part. 🙂 Add the dye into the spaces divided by the rubber bands. Make sure to get into each fold as much as possible or as much as preferred. If you want more white space on your shirt then don’t do as much dye. I wanted mostly color so I did a lot.
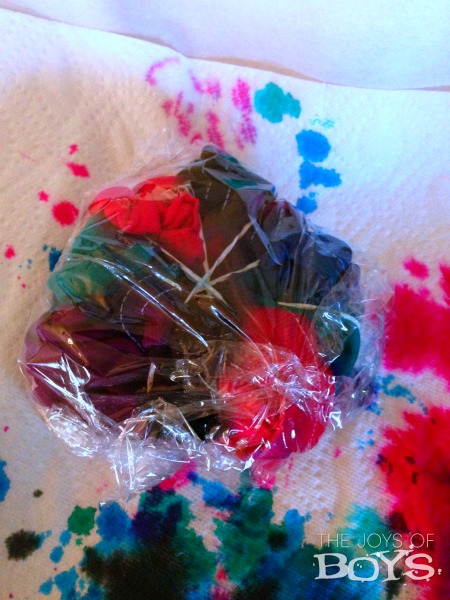 Step 5: Wrap your wet shirt in plastic wrap so that it doesn’t dry out and let it sit for 6-8 hours. I just left mine overnight and it worked perfectly.
Step 6: Put on another pair of gloves and then unwrap the shirt from the plastic.
Step 7: Rinse the shirt in water to get off the excess dye. I had to do this for quite awhile and was worried that I was going to lose a lot of my color but it stayed dark. Cut the rubber bands and wash and dry separately.
You will want to wash and dry your tie-dye shirt separately for the first few washes unless you are interested in colorful laundry. 🙂
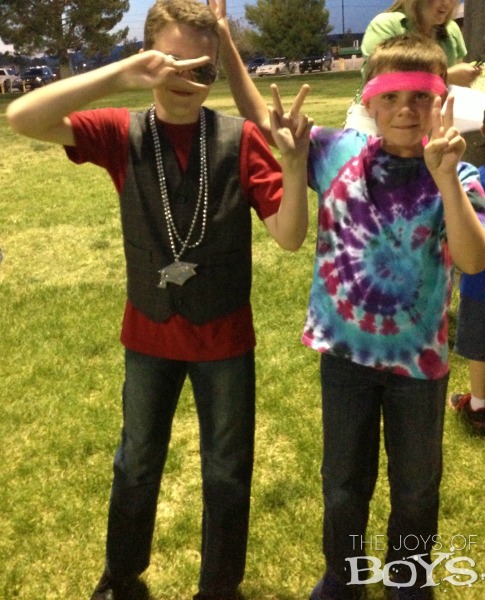
He thought his tie-dye shirt was totally groovy what do you think?
So glad it worked out! 😀